Sunday, January 13, 2008

Sexy Myspace Photo

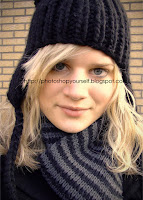
Spice up your myspace photos with an easy, less than 10 step tutorial that will bring an ordinary photo to an extraordinary piece. Below are the before and afters of the start photo and end photo and the video for how to make your photos stand out.


Please offer feedback via comment.

Things to keep in mind, this is not an expert photoshop tutorial, I have never and will never say such a thing. This is for your typical photoshop user who has a limited knowledge of how to create the photos that they like. It's only 5 minutes of your life.

Jack Stamos

Friday, December 21, 2007

High Dynamic Range -- Photoshopt Tutorial

Ok, with the popularity of my last tutorial booming right now, I decided to throw down another tutorial before I am considered dead in the water. Today I'm going to be doing two tutorials regarding faking HDR imagining within Photoshop. H(igh)D(ynamic)R(ange) photography has long been desirable but unless you have a tripod and a 10+mp camera, a lot of time, experience and patience, good luck.

So I will be detailing a quick fix in HDR and a longer (but ultimately better) way of faking HDR within Photoshop CS3.

Version 1 HDR -- Easy fix
First things first, find yourself a good image. It is suggested that the image be of good size. (above 800/600)

Apply an Unsharp Mask

40%
250 Pixel


Duplicate Layer

Hue/Saturation
WITHOUT COLORIZE


Saturation -80

It'll look like this!


Set layer to 25% Opacity
Blend Mode: Overlay

It'll look like this!


Merge Visible


Hue/Saturation
WITHOUT COLORIZE

Saturation +10

The final product of the easy 5 step process for faked HDR imaging in Photoshop!


And here is a progression of the steps above!

Wednesday, December 19, 2007

Popular Lomo Cross Processing Tutorial

Ok, for my first tutorial I am going to go with the increasingly popular Lomo Style Cross Processing. I am using Photoshop CS3 for this and all upcoming tutorials, so keep this in mind if you have an outdated version of Photoshop. Most things I will do will be applicable in all versions of photoshop but I can not say all will be. So let's get into it!

First, find a photo. For this tutorial I'm going to use the helping hand of http://www.sxc.hu for it's vast stock photography and choosing a photo of a girl I have named Jordan. (I have no clue who she is or what her name is.) Onward, we march! This effect works will with head shots and busts, some minor tweaking is necessary for outdoor photos but rarely anything drastic.
Duplicate the layer, very easy no photo necessary.

Go to Filter>Distort>Lens Correction
Vignette Amount -50
Vignette Midpoint +50


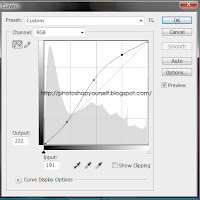
It will look like this.Go to Image>Adjustments>Curves
Points:
55, 55
121, 159
191, 222
255, 255


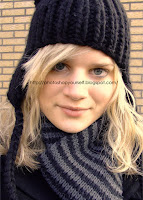
Your image will now look like this.
Duplicate this layer

Go to Image>Adjustments>Levels
Click off the RGB and go to the RED LEVEL only.
Input 55, 1.0, 255 as values
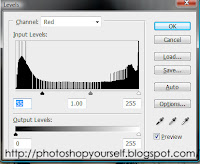

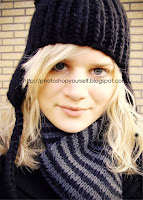
Your image will now look like this.
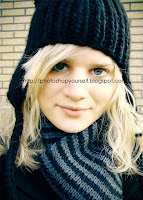
Merge all visible layers
(Right Click in your layers pallet on an image and Go to the bottom.)

Go to Image>Mode>Labcolor

Go to Filter>Sharpen>Unsharp Mask
Amount 50%
Radius 50 Pixels
Threshold 0
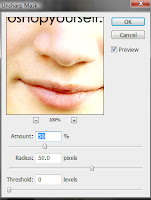

Go to Image>Mode>RGB and Save!

Here's your final product!
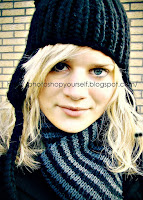
And here is a progression!